# 一.Python 安装
在 centos 服务器上安装 python3.10
# 1.安装依赖
# 安装依赖库
yum install wget zlib-devel bzip2-devel openssl-devel ncurses-devel sqlite-devel readline-devel tk-devel gcc make zlib zlib-devel libffi-devel -y
1
2
2
# 2.下载 python
# 下载python
wget https://www.python.org/ftp/python/3.10.0/Python-3.10.0.tgz
1
2
2
网页下载
https://www.python.org/downloads
https://www.python.org/downloads/windows/
# 3.解压
# 解压
tar -zxvf Python-3.10.0.tgz
1
2
2
# 4.进入目录
# 进入目录
cd Python-3.10.0
1
2
2
# 5.校验环境
# 校验
./configure --enable-optimizations
1
2
2
# 6.编译
# 编译
make -j 8
1
2
2
# 7.安装
# 安装
sudo make altinstall
1
2
2
# 8.验证
# 验证
python3.10 --version

# 查看 Python 2 版本
python --version

# 查看 Python 3 版本
python3 --version
1
2
3
4
5
6
7
8
2
3
4
5
6
7
8
# 9.虚拟环境
#创建虚拟环境
python3.11 -m venv myenv

#激活环境
source myenv/bin/activate
1
2
3
4
5
2
3
4
5
# 10.进入与退出
#进入
Python3

#退出
exit()

#退出
Ctrl-D
1
2
3
4
5
6
7
8
2
3
4
5
6
7
8
# 二.老版本处理
# 1.解压
# 删除系统自带的老版本(python2)的软链接
rm -f /usr/bin/python
1
2
2
# 2.创建软连接
# 创建软链接
ln -s /usr/local/python3.10.4/bin/python3.10 /usr/bin/python
1
2
2
# 3.系统只认 python2 问题
修改2个文件
/usr/bin/yum
/usr/libexec/urlgrabber-ext-down
1
2
2
修改方式
将
#!/usr/bin/python
改为
#!/usr/bin/python2
1
2
3
4
2
3
4
# 4.conda 虚拟环境
# 创建环境
conda create -n chatbot python=3.10

# 激活环境
conda activate chatbot

# 查看环境
conda info --envs
1
2
3
4
5
6
7
8
2
3
4
5
6
7
8
# 三.依赖安装
# 1.pip 版本
# 查看版本
pip --version

# 更新版本
pip install --upgrade pip

# 使用镜像
pip install pip --upgrade -i  https://mirrors.tuna.tsinghua.edu.cn/pypi/web/simple/

# 查看最新的版本
pip --version

# 该命令会重新安装 pip,如果 pip 已经安装,会更新 pip 到最新版本
python -m ensurepip --default-pip

# 查看所有已安装
pip list
1
2
3
4
5
6
7
8
9
10
11
12
13
14
15
16
17
2
3
4
5
6
7
8
9
10
11
12
13
14
15
16
17
# 2.查看已安装
# 查看所有已安装
pip3 list
1
2
2
# 3.安装包
# 安装pip
python3.6  get-pip.py
1
2
2
# 4.指定版本
# 指定版本安装
pip install langchain==0.0.211
1
2
2
# 5.更新依赖
# 更新版本
pip install langchain --upgrade -i  https://mirrors.tuna.tsinghua.edu.cn/pypi/web/simple/
1
2
2
# 6.卸载包
# 卸载包
pip uninstall 第三方包名
1
2
2
# 7.文件安装依赖
# 使用脚本安装依赖
pip install -r ci-requirements.txt
1
2
2
ci-requirements.txt
langchain==0.0.211
responses==0.23.1
aioresponses==0.7.4
matplotlib==3.7.1
uvicorn==0.22.0
python-dotenv==1.0.0
python-graphql-client==0.4.3
tomli==2.0.1
python-socketio==5.8.0
fastapi==0.95.1
fastapi-socketio==0.0.10
watchfiles==0.19.0
asyncer==0.0.2
uptrace==1.18.0
openai==0.27.4
aiofiles==23.1.0
1
2
3
4
5
6
7
8
9
10
11
12
13
14
15
16
2
3
4
5
6
7
8
9
10
11
12
13
14
15
16
# 8.安装包搜索
# 四.mac 安装 python
# 1.校验版本
Python

Python3
1
2
3
2
3
# 2.brew 安装
会自动安装最新版本的 Python3
# brew命令安装Python3
brew install python3

# 验证版本
Python3
1
2
3
4
5
2
3
4
5
安装完成后重新运行命令行:Python3,即可查看安装的 Python 版本。
# 3.官网下载安装
下载地址 Python Releases for macOS (opens new window)
点击该链接,下载完成后得到一个 Python 3.9.6 - 2021 年 6 月 28 日安装包。
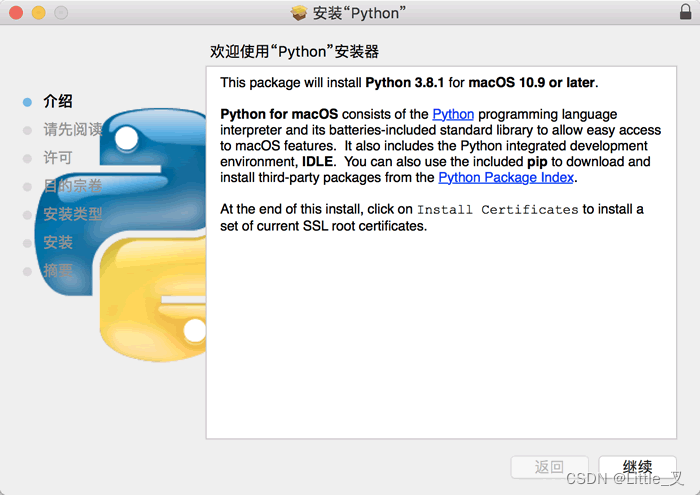
双击 Python 3.9.6 就进入了 Python 安装向导,然后按照向导一步一步向下安装,一切保持默认即可

# 4.测试代理
curl https://api.openai.com/v1/chat/completions \
  -H "Content-Type: application/json" \
  -H "Authorization: Bearer sk-xxxx" \
  --proxy "https://qinyingjie.top:17890" \
  -d '{
     "model": "gpt-3.5-turbo",
     "messages": [{"role": "user", "content": "Say this is a test!"}],
     "temperature": 0.7
   }'
1
2
3
4
5
6
7
8
9
2
3
4
5
6
7
8
9
